The Trustees of Reservations
Weir River Farm
Farm Blog
A Trustees Property
Moose Hill Farm CSA
CSA Info | Educational Programs | Get Involved | Meat & Egg Program | Visit Weir River Farm


Saturday, October 25, 2014

Harvest Celebration! Potluck and Yoga this Thursday

Our final week's Kitchen Sink Share showcased the full palette of the fall harvest
Come celebrate a successful CSA season with us! Thursday, October 30th we're toasting the good harvest and enjoy each other's good company. We'll start the evening with some yoga upstairs with Maureen St. Croix at 5:30, then potlucking in the CSA room at 6:30. Come to either or both!
What to bring: for yoga, bring a mat and wear comfortable clothes. For potluck, bring a soup, salad, or appetizer if your last name is in the first half of the alphabet, and an entree or dessert if you're in the second half.
Hope to see you there!

Monday, October 20, 2014

Kitchen Sink Share!

Our last share of the season is a big one! We've got all the good stuff in here--classic fall root veggies, long-holding storage crops, another winter squash, plus a big mess of greens, including some we haven't seen since the spring. The last of the Weir River veggies will hold you over for quite a while!

Now that the temperature's been dropping into the 40's (and lower!) at night, our carrots, beets, and leafy greens are starting to sweeten up. Veggies do this cool trick of increasing the sugar content of their cells in order to prevent being frozen during cold nights. It protects them AND benefits us!

Don't forget our CSA Harvest Celebration: Yoga and Potluck Feast next Thursday, Oct. 30th: 5:30 for yoga, 6:30 for potluck at the Yellow House. Come to either or both, no RSVP necessary. We'll be upstairs in the Yellow House for yoga class and down in the CSA room for the potluck. If your last name is in the first half of the alphabet, please bring a salad, soup, or appetizer; names in the last half of the alphabet, please bring an entree dish or dessert. We'll toast the harvest and say goodbye to our fabulous farm apprentices, Joe and Sophie, who are on to new adventures at the end of the month.
Joe and Sophie planting spinach back in April

Our great CSA season this year wouldn't have been possible without the help and hard work of so many, starting with our vital soil microbial community. Our soil food web is the base that supports and nourishes our crops as they industriously convert sunshine into food day in and day out. Our crops support and are served by our honey bees and many native pollinator species, and our insect defense force of parasitic wasps and predatory beetles and nematodes. Our fabulous field crew worked tirelessly no matter what the weather to bring out the best in our crops in the field and bring in the best of our crops for harvest. The diverse talents and cheerful work of so many of our CSA members and volunteers made me so grateful to be a part of the ecology of this beautiful place. I hope you're as proud of it as I am. Thank you.

In your share this week: Brussels sprouts!!, carrots, watermelon radishes, leeks, beets, onions, garlic, lettuce, kale, spinach, chard, bok choy, potatoes from Moraine Farm, and butternut squash from Langwater Farm, plus a Pick Your Own herb bonanza: parsley, sage, rosemary and thyme (and chives even though they got no love from Simon & Garfunkel). See you next season!

Recipe of the Week

Wondering what to do with the watermelon radishes? I usually cut them into wedges and add to them to my roasted root medley along with beets and carrots and onions and maybe a winter squash. You can also roast them on their own--wedge them, drizzle and toss with olive oil, sprinkle with sea salt, spread on a metal cookie sheet and roast at 375F, turning every 15-20 minutes. They roast in 30-60 minutes, depending on how fat the wedges are.
Roasting is also my favorite way to serve Brussels sprouts-- Ina Garten aka the Barefoot Contessa has a simple recipe here.
Several years ago I did some WWOOFing for a woman whose previous career had been camp cook for an African safari company. She taught me this kale recipe that she had picked up working there. It's easy and a nice twist on the standard sauteed kale that I make so often.

Peanut Butter Kale

Olive oil
2 cloves garlic, minced
1 small onion, chopped
1/2 cup peanut butter
1-2 Tbs Braggs amino acids
1/4 tsp cayenne or chili powder (more if you like spicy)
1 bunch kale, washed, rib removed, and leaves torn roughly
salt to taste

In a large saute pan, saute the onions and garlic until translucent. In a small bowl, make the peanut butter sauce. Add hot water (start with 1/4 cup) until the peanut butter has a consistency slightly thicker than cake batter. Stir in the Braggs and the cayenne/chili powder and set aside.
Add the kale to the saute pan and cover the pan for a few minutes to help wilt the kale. Once the greens have wilted, stir in the peanut butter sauce and adjust seasonings to taste. Serve immediately.

Monday, October 13, 2014

October in the fields

The polls have closed! No, you didn't miss the mid-term elections, but we have a date for our end-of-season CSA Harvest Celebration: Yoga and Potluck Feast and it's Thursday, October 30th. Yoga class with Maureen St. Croix will begin at 5:30pm followed by a potluck feast beginning at 6:30. Can't make it to both? No worries! Come to either or both, no RSVP necessary. We'll be upstairs in the Yellow House for yoga class and down in the CSA room for the potluck. If your last name is in the first half of the alphabet, please bring a salad, soup, or appetizer; names in the last half of the alphabet, please bring an entree dish or dessert. Here's to the abundant harvest this year!

Fall work around the farm in October divides mostly between harvesting and putting the fields to bed. Our excellent crew members Casey and Maddie are gone for the season, leaving a pared-down field crew these days. Our harvest mornings are full-speed-ahead as we try to get everything in from the field in time. In the afternoons we work on breaking down the remnants of our summer crops and getting beds ready for their winter cover crops. Last week we started work on the other major fall project: planting next year's garlic. Garlic is a looooooong season crop and requires the frigid temperatures of winter to break dormancy and properly establish a strong root system. Garlic planting is slow work (and muddy with all the recent rain), but it feels good to be paying it forward to next season in the afternoon after a morning spent harvesting so many of this season's happy, healthy crops.

In your share this week: beets, carrots, lettuce, hakureis, leeks, chard, kale, another butternut squash from Langwater Farm in Easton, potatoes from Moraine Farm in Beverly, and Pick Your Own parsley from our PYO section.

Recipe of the Week
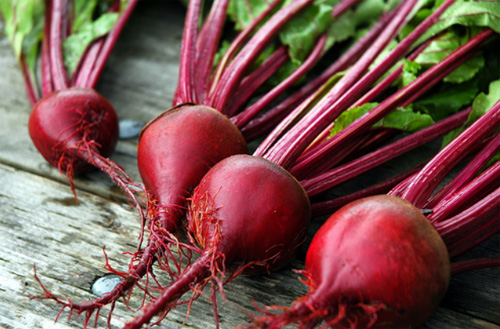
CSA member Lindsay Grimes (of the lovely and tantalizing blog I Will Feed You) is on a quest to become a beet lover this year. When we had beets in the share earlier this year she brought us some beautiful pink beet hummus that she had made--it was delicious! Her recipe is simple and the photos of the process on her blog are beautiful--take a look here.

Beet Hummus,
Lindsay Grimes at iwillfeedyou.com

4 large beets, stems and greens removed
2 – 15 oz. cans of chickpeas, drained, and rinsed, peeled if so desired
1 clove garlic
1/2 cup quality olive oil
zest and juice of 1 lemon
1 tablespoon tahini

sea salt and pepper to taste

photo: Lindsay Grimes, iwillfeedyou.com
Preheat oven to 425, wrap each beet in tin foil with olive oil, salt and pepper.  Bake for 40 – 45 minutes until tender. In the mean time, drain and rinse chickpeas. Remove the external layer of skin from chickpeas if you deem you have time. This step will yield a creamier texture.

Once the beets are out of the oven, let them cool to room temperature. At this point it should be easy to peel away the skins with your fingers. Once skinned, roughly chop the beets. In the bowl of a food processor blend the chickpeas, beets and any roasting juices, garlic clove, olive oil, lemon zest + juice, and tahini until well combined. Taste for seasonings and adjust. Check for any lumpy bits of beet that may have missed the blade. Garnish well with good Olive Oil.

Serve this eye catching dip with toasted pita chips or crisp vegetable crudité.  Beet Hummus will keep well in the fridge for 3-5 days and freezes beautifully if you want to save it for another day. Just be sure to give it another good whip once it thaws as it may separate a bit.

Enjoy your share this week!

Tuesday, October 7, 2014

Farm Fresh Yoga & CSA Harvest Celebration Date

Sunrise Yoga this Saturday!


Farm Fresh Yoga continues this Saturday with a sunrise class at 6:30am. Wake up with the sun and
enjoy an early morning practice while the farm is quiet and still. CSA member and yoga teacher Maureen St. Croix will lead class at the Yellow House. Class is free for CSA members and donation requested for friends and neighbors. Proceeds benefit our Food Access Fund. Please RSVP to Rory at rodwyer@ttor.org and bring your mat!

CSA Final Week and Harvest Yoga & Potluck


While we've still got a few weeks of yummy CSA veggies ahead of us, it's suddenly October! Fall is flying by here on the farm! Our last CSA pickup of the year will be Oct. 21st (for Tuesday shares) or Oct. 23rd (for Thursday). It's time to start thinking about our end-of-season CSA Harvest Yoga and Potluck Celebration. Here's a link to a quick poll to determine which day will suit everyone best:

http://doodle.com/5aksi75ytv48kkzt

In next week's newsletter I'll announce the date. I'm looking forward to sharing a fun & delicious dinner with all of you!

Monday, October 6, 2014

Delicata-licious

Lots more fall goodness in the share this week as we finally get into our late season carrot crop, and
also bring in some classic fall veggies from local farms. This week we have more potatoes from our
sister farm in Beverly, Moraine Farm, and from Langwater Farm in North Easton, we have butternut squash and delicata squash. Delicata, an often unheralded winter squash variety that's overshadowed by the classic butternut, is one of my favorite varieties, both for its excellent sweetness and its ease of preparation. It's delicious all by itself--I hope you all like it as much as I do.

Weir River Farm's first beef sale of the season is this week! Wednesday, Oct. 8th, we'll be open at the Yellow House from 1-6pm. Our pasture-raised Belted Galloway cattle produce beef that is very high in flavor and low in fat and are free of any growth hormones, steroids, or antibiotics. We'll be offering almost a dozen steak cut choices, several roast choices, as well as ground beef, short ribs, and bones for stock. The best cuts go fast, so make sure to get here early! Call us the farm office at 781.740.7233 if you have more questions--see you at the beef sale!

In your share this week: yellow storage onions, beets, carrots, kale, chard, salad mix, potatoes and winter squash--butternut and sweet delicata. We'll take a break on Pick Your Own crops for the first time in a long time, but don't worry--there's more coming before we finish up this season!

Recipe of the Week

Roasted Delicata

2 Delicata squash
2 Tbsp olive oil
salt to taste

Preheat the oven to 425F.
Delicata don't need peeling like other winter squash varieties, so just rinse them off and trim off the button end and the stem. Cut the squash in half the long way so you have 2 boats, then scrape the seeds and gunk out. If you like, you can save the seeds and roast them as you would pumpkin seeds. Cut the squash into a 1/2" to 3/4" dice. Toss with the olive oil and salt to taste.
Spread the squash evenly into a single layer on a metal baking pan or cookie sheet. A metal pan is best to get the most caramelization. Roast, turning at 10 and 20 minutes, for 25-30 minutes. When the pieces are fork tender, they're done. Serve hot.

Some of my favorite variations: After tossing with olive oil, you can spice them with cumin (1-2 tsp) or with cayenne (1 tsp or to taste). You can also include delicata in a roasted root veggie medley with carrots, beets, onions, garlic, parsnips, celeriac, or rutabaga.

Monday, September 29, 2014

Go greeeeeeens!

We're back into greens this week! All of our greens crops love the (usually) cooler weather of fall (the weekend's weather notwithstanding). They've been growing in the field since August and are looking like they're ready for their first harvests. Also ready for prime time this week is our beet crop, which is looking healthy and abundant this fall. We got some fabulous help with this crop (and our
carrot crop--ready soon!) from an incredible team of freshman Boston University students in August. We had over a hundred students on the farm over 3 days and they helped us with the very time-consuming work of hand weeding and thinning our many rows of carrots and beets. A great group of students from all over the country and the world, they were enthusiastic farm helpers and completed a jaw-dropping amount of work in the short time they were here. This beet's for you, BU!

This Saturday, Oct. 4th, is our annual Fall Festival! We'll have live music, pony rides, hands-on crafts for kids, a food truck with lobstah rolls, fried clams, and rotisserie roast beef (yum!), fresh squeezed lemonade, farm demonstrations, and of course our sociable barnyard livestock. Come over between 10am and 2pm for good old-fashioned family fun on the farm!

As tomato season winds down, make sure you get your sauce made for the winter! We still have ugly tomatoes available for sale at $1/lb--email me at rodwyer@ttor.org and I'll have your packed up and ready for you at pickup! In your share this week: storage onions, beets, radishes or mustard greens, chard or kale, tomatoes, and the long-awaited return of arugula and salad mix! PYO this week will be the last of the cherry tomatoes, green beans, and sage.

Enjoy!

Monday, September 22, 2014

Allium Appreciation Society

As we slip further into fall, we're still hanging on to a few of our summer crops. After a pretty good run with tomatoes and cherry tomatoes, they'll be slowing down towards the end of the week. And then it'll be a long, long time before we see another holy grail tomato-- in-season, field-grown, and vine-ripened. For now, we can savor the time we have left. 
Casey with the prettiest tomato of the day.
Photo: Sophie Schillue
Garlic is back in the share this week, to join its allium family members--leeks and some specialty onions. Our garlic crop was picked in July, a little smaller than I'd like but otherwise a healthy crop that got a lot of compost in the spring. It cured in the greenhouse for over a month, drying out and
Greenhouse full of garlic!
sealing in flavor with help from the extra heat in there. The specialty onions we have this week are cippolini onions and shallots. Cippolinis are those flat, almost donut-shaped onions, that are sweet and mild. Deborah Madison, author of the famous Vegetarian Cooking for Everyone, has a new cookbook out--Vegetable Literacy--and I've been dipping into it here and there. Her section on cipollinis includes the following advice:

"While you can do all those things with cipollini onions you do with your basic storage onion, they're an onion to be featured whole, not just used as an ingredient. It makes sense to cook them in a way that showcases their form, such as braised with rosemary and sage, pan roasted, oven roasted, or grilled. They make a special treat to offer friends and family. The only challenge to cippolini is in peeling them. I find it works best to drop them into a pan of boiling water for a half minute or so, then carefully pull back the skins and cut them off along with part of the root. Or you can pour boiling water over them, then slip off the outer skins after taking away a thin slice at the base."

In your share this week: tomatoes, leeks, husk cherries, garlic, cippolinis and shallots, radishes, and PYO cherry tomatoes and flowers. Remember to bring back any little green containers you have!

Recipe of the Week
This is one of farm apprentice Sophie's favorite tomato recipes. It smells great in the oven and is perfect for a slightly chilly autumn evening. 

Scalloped Tomatoes
from Ina Garten at barefootcontessa.com

Good olive oil 
2 cups (½-inch diced) bread from a French boule, crusts removed 
2.5 lb red tomatoes, 1/2 inch dice 
1 tablespoon minced garlic (3 cloves) 
2 tablespoons sugar 
2 teaspoon kosher salt 
1 teaspoon freshly ground black pepper 
½ cup julienned basil leaves, lightly packed 
1 cup freshly grated Parmesan cheese 
Preheat the oven to 350 degrees. 

Heat 3 tablespoons of olive oil in a large (12 inch) sauté pan over medium heat. Add the bread cubes and stir to coat with the oil. Cook over medium to medium-high heat for 5 minutes, stirring often, until the cubes are evenly browned. 

Meanwhile, combine the tomatoes, garlic, sugar, salt, and pepper in a large bowl. When the bread cubes are done, add the tomato mixture and continue to cook, stirring often, for 5 minutes. Off the heat, stir in the basil. 

Pour the tomato mixture into a shallow (6 to 8 cup) baking dish. Sprinkle evenly with the Parmesan cheese and drizzle with 2 tablespoons of olive oil. Bake for 35 to 40 minutes until the top is browned and the tomatoes are bubbly. Serve hot or warm. 

Monday, September 15, 2014

Slowly slipping into fall

This is the first week of the season that we start to see fall overlapping with summer in the crops that we're harvesting. Mornings out in the field have been feeling noticeably more chilly and sunset has been catching me off guard at the end of the day. The leeks and radishes we'll be bringing in this week are the harbingers of future harvests of kale, carrots, and beets deeper into the fall.

While radishes are a fast-growing crop, seeded in the field only about a month ago, our leek crop has been a long project, starting in April when we first seeded them into little cells in flats in the
Baby leeks in the greenhouse this spring.
greenhouse. They grow slowly, taking lots of time to stretch their roots out into the soil, and develop from spindly little grass-like shoots into sturdy, flavorful vegetable stalwarts. This prolonged adolescence in leeks gives the competition (ie, fast growing and ubiquitous weeds) lots of time to get established and give the crop a run for its money (or its soil nutrients and solar access). During the mid-summer months we spent lots of time weeding and hoeing in the leek field, beating back the weeds and trying to give our leeks the edge. With a healthy and abundant crop in front of us, it looks like our work paid off.

Farm Fresh Yoga this Saturday (9/20) at 11am celebrates the Autumn Equinox. Bring your mat and get ready to enjoy a sunny yoga class on our beautiful hillside. Guests are welcome with a sliding scale donation to our Food Access Fund.
In your share this week: more heirloom and red slicing tomatoes, red potatoes from Moraine Farm, leeks, first radishes of the fall, husk cherries, tomatillos (for fresh salsa verde!), Pick Your Own cherry tomatoes and Pick Your Own flowers. Please bring back any pint and quart containers you might have at home so we can reuse them!

Recipe of the Week

Since we have both potatoes and leeks in the share, this week's recipe showcases this classic duo in a soup perfect for the first weeks of fall.

Leek and Potato Soup
from Anna Thomas' The New Vegetarian Epicure

2 1/2 cups sliced leeks, white and light green parts only
1 Tbs butter
2 lb potatoes
2 cups water
1/2 tsp salt
2 cups vegetable broth
1-2 Tbs chopped fresh dill
1-2 Tbs chopped fresh parsley
juice of a quarter of a lemon
freshly ground black pepper
optional: milk or cream to taste

Wash the leeks, quarter them lengthwise, and slice them thinly. Melt the butter in a large non-stick skillet and cook the leeks in it over medium heat, stirring often, until they are limp and just hinting at the idea of coloring.
Meanwhile, peel the potatoes and cut them in a 1/2-inch dice. Combine them in a saucepan with the 2 cups of water and the salt, adding a little more water only if needed to cover them. Bring the water to a boil, lower the heat, and simmer the potatoes until they are completely tender.
For a more intense potato flavor, cook the peels in a separate pot, in just enough water to cover. When the potatoes are tender, strain the water off the peels and add it to the soup.
Add the cooked leeks to the potatoes, along with the vegetable broth, chopped herbs, lemon juice, and pepper. Cook everything together for about 10 more minutes, then taste and correct the seasoning with more salt or pepper if desired.
If you like a chunky soup, it's ready. If you want it less chunky, use a potato masher. If you want it smooth, puree it in a blender in batches, but be sure to blend very briefly, as potatoes suffer from overprocessing. For a creamier soup, stir in a little milk or cream now.

Monday, September 8, 2014

Tomatonado 2: Lost in the Cherry Tomato jungle again!

Purple Bumble Bee variety
Like last week's run through of our different heirloom tomatoes, this week the cherry tomatoes are up for a roster check. Many of our cherry tomato plants are over 7 feet tall and they're not done growing yet! Although the temps for this week will be in the more comfortable range, we'll still be reaping the benefits of last week's heat in our tomato fields. As you pick your way through our delicious jungle, keep an eye out for these varieties.

Sungold--This year there are ample amounts of these round, bright orange bursts of sugar. They've been called a one-trick pony because their sugar content (or Brix levels) is their only selling point, but I grow cherry tomatoes mostly for the sugar rush, so it's really the only trick I want them to do. The major defect of the Sungolds is that they split sooooo easily, making a gooey mess if you picked them first into the bottom of your quart basket. Best to top off your basket with these so they're not squished by the weight of the others. These little guys are prolific on huge plants (easily the largest plants the farm will grow all year), making the Sungold sections of the cherry tomatoes the most jungle-like.

Esterina-- Yellow and almost as sweet as their Sungold neighbors, the Esterinas are blocky in shape--somewhere between round and square--and a little larger. I discovered this variety by accident last year (I thought I had planted a small, red, round variety and this was definitely not that) and fell in love. If I wasn't so addicted to the sugar shot of the Sungolds, this would be my favorite variety. Esterinas have a firmer, meatier texture, plenty of sweetness, and rarely crack or split.

Jasper--The only red cherry tomato out there is this guy--small, slightly olive-shaped, a beautiful deep red, and very tasty. This plant has been bred with some resistance to the bogeyman of tomato diseases, Late Blight (Phytophthera infestans), so it should be the last variety standing this year, once the disease moves in towards the end of the month.

Black Cherry--Large, round, dusky, and super juicy, these plump purple beauties pop in your mouth like a grape. Try one and you'll come over to the dark side too!

The Bumble Bees--Pink, Purple, and Sunrise. A new variety from my favorite seed supplier (Johnny's Seeds in Maine), these striped bi-color cherries are big and round. Don't be fooled into thinking they're not ripe just because of the green stripes. Not only are they visually very striking, they have a good balance of sweet and tangy tomato flavor.

Yellow Pear-- yellow and pear-shaped (surprise!). These reach their peak flavor at the end of September, when other varieties start to fade. Their shape adds curb appeal to the mix while they wait for their ugly duckling moment to shine.

another massive Striped German heirloom
A couple of reminders--if you have any of our pint, half pint, or quart containers kicking around in your kitchen, please bring them back and we will reuse them! Our next Farm Fresh Yoga class with Maureen St. Croix is next Saturday, 9/20, at 11am--Sun salutations on the farm! Practice your downward dog with our new puppy Woody and the Oreo cows! And then relax in Savasana and listen to the wind blow across the fields--what could be better than that?? In your share this week: more tomatoes! Red slicers, orange slicers and heirlooms of all colors to choose from; Husk cherries, purple potatoes from Moraine Farm, a basket of fresh onions (perfect for kebabs!), another big bunch of PYO flowers and 3 more quarts of PYO cherry tomatoes!

Recipe of the Week
For your cherry tomato bounty this week, a recommendation from CSA member Eileen Small--another great recipe from Ree Drummond of the Pioneer Woman blog. Worth turning on your oven for!


Cherry Tomato Tart
Ree Drummond at the pioneerwoman.com
Per usual, Ree takes you through the recipe with great step-by-step instructions and fabulous photos--click the link for some grade A food porn.

4 Tablespoons Butter
2 whole Large Onions, halved and sliced thin
Salt And Pepper, to taste
2 whole Store-bought Pie Crusts (or 1 good sized homemade crust)
1-1/2 cup Grated Fontina Cheese (or Monterey Jack)
1/4 cup Grated Parmesan
1/4 cup Grated Gruyere (or Swiss)
3 cups Cherry Tomatoes (yellow or red), washed and dried (more if needed)
1 whole Egg
1/4 cup Milk
16 whole Basil Leaves, Chiffonade (more if needed)

Heat a large skillet over medium-low heat. Add the butter, onions, salt, and pepper and cook for 20 to 25 minutes, stirring occasionally, until the onions are soft and deep golden brown. Set aside.
Preheat the oven to 450 F.
Smush both pie crusts into a ball, knead it around a bit to combine them, then roll it out into one large, thin crust. Lay onto a shallow quarter sheet pan, a tart pan, or cut in half and use 2 standard pie pans. Sprinkle on the cheeses in a single layer, then lay on the caramelized onions, then sprinkle the tomatoes over the cheese.
Mix together the egg and milk in a small bowl and brush it all over the crust around the edge of the tart. Bake the tart for 15 to 18 minutes, watching carefully to make sure the crust doesn't burn. (The tomatoes should be starting to burst apart, with some dark/roasted areas on the skin, and the crust should be deep golden brown.) If the crust is getting brown too fast, reduce the heat to 425 F.
Remove the tart from the oven and allow it to sit for 5 minutes. Sprinkle the basil all over the top. Cut into squares and serve!

Enjoy!

2014 Farm Crew at the Farm to Table this weekend:
Joe, Rory, Casey & Sophie

Monday, September 1, 2014

What's with the funny looking tomatoes?

As the heat continues this week, we should see more of our heirloom tomatoes ripening. Here's a quick rundown on what you need to know about our heirlooms. First, heirloom tomatoes are famous for both their rich, juicy, true tomato flavor and their lumpy, bumpy, easily-bruised delicateness. Think Princess and the Pea meets the Ugly Duckling on the outside, sweet ambrosia of summer on the inside. Heirlooms also tend to ripen less uniformly than our modern red slicing tomatoes. Often the bottom of the fruit is ripe and ready to eat while the top is still slightly green. If you can hit the precise window when the whole fruit is neither under- nor over-ripe (the precise window may only be a minute and 45 seconds long), you should buy a lottery ticket -- and a bib. Here are some characteristics to look for in the varieties we have ripe this week-- 
Speckled Roman (front right in the picture above) - meaty texture without the usual heirloom seediness. It was bred as a paste tomato, but it's too yummy to bury in a sauce. 
Japanese Trifele (front left) - pear-shaped and purple, with a rich, almost smokey flavor. 
Striped German (back right) - notable for their monster size--they regularly top 2 lb.--this is one of my all-time favorite varieties. As with all yellow and orange tomatoes, the Striped German has low acidity and is very juicy. When sliced, the red streaks through the middle look like a sunset. 
Paul Robeson (middle back) - Another rich, smokey tomato with gorgeous color--the taste and the color make a great counterpoint to the Striped Germans. 
The Orange Blossom variety in the back left isn't a true heirloom, but has lovely orange color and the same low acidity as the Striped German. 
Next week we should see some more ripening from the Cherokee Purples (lumpy bumpy like a Striped German and dark purple like a Paul Robeson) and the Green Zebras (another psuedo-heirloom with green and yellow stripes). 

If you're in the sauce-making mood, we have a limited supply of tomatoes that were too ugly to make the CSA cut, but are perfectly serviceable. Scarred, cracked, poked, misshapen, or bruised, they are tomatoes only a mother could love. $10 for 10 lbs--email me at rodwyer@ttor.org to reserve yours for your pickup day. 

In your share this week: tomatoes! a jumbo head of garlic, the last of the summer onions, red potatoes from our sister farmers at Moraine Farm in Beverly, the first husk cherries (aka ground cherries) of the year, 3 quarts of Pick Your Own cherry tomatoes (!!!), and a huge bouquet of PYO flowers. 


Recipe of the Week

A Caprese salad with reduce balsamic vinegar is my favorite way to showcase not only the amazing flavor of ripe, in-season tomatoes, but also their diversity of colors and shapes. Ree Drummond at The Pioneer Woman Cooks has the recipe I originally started making Caprese with. Sometimes I substitute burrata (a sort of cream filled mozzarella) for the mozzarella that Caprese is traditionally made with. The burrata variation is waaaaay messier, but the creamy softness adds so much to the dish it's worth it. 

Caprese Salad
Ree Drummond, thepioneerwoman.com
(the photos on this post are guaranteed to make your mouth water)

2 cups Balsamic Vinegar

3 whole Ripe Tomatoes, Sliced Thick

12 ounces, weight Mozzarella Cheese, Sliced Thick

Fresh Basil Leaves

Olive Oil, For Drizzling

Kosher Salt And Freshly Ground Black Pepper
In a small saucepan, bring balsamic vinegar to a boil over medium-low heat. Cook for 10 to 20 minutes, or until balsamic has reduced to a thicker glaze. Remove from heat and transfer to a bowl or cruet. Allow to cool.
When you're ready to serve, arrange tomato and mozzarella slices on a platter. Arrange basil leaves between the slices. Drizzle olive oil over the top of the salad, getting a little bit on each slice. Do the same with the balsamic reduction, making designs if you want. Store extra balsamic reduction in fridge for a later use.
End with a sprinkling of kosher salt and black pepper. Serve as a lunch, with crusty bread. Or serve alongside a beef main course for dinner.


Monday, August 25, 2014

If April showers bring May flowers, then August heat brings vine-ripe tomatoes

The warmer weather expected this week is a boon for our 2nd succession of tomatoes. We started seeing a jump in ripening over weekend and with the 80 degree days and nights in the 60s, we're excited for our first real harvest of tomatoes this week. This planting of tomatoes has a mix of regular red slicing tomatoes, plus several varieties of heirlooms, so there's something for everybody. This 2nd succession, which is growing vigorously down in the field below the Yellow House, has never seen any deer damage (knock on wood!!), as that field is too exposed and offers poor conditions for grazing. We're hoping for a good run of tomato harvests from the over 800 plants we have growing here, which is almost double the number of plants that the deer destroyed up in the top field.

This past week saw a lot of our livestock vacationing off the farm at the Marshfield Fair with our many 4Hers. Weir River pigs, lambs, goats, and chickens were all represented in numerous competitions and the ribbon count is climbing every day. Everybody will be back home in the barnyard by the end of the week, returning to their daily chores of pecking bugs, munching grass, bathing in mud puddles, and making friends with farm visitors.

As a reminder, if you need to switch your pickup day this week (or any week), please email me by Monday at 6pm so that we can make sure to harvest for you on the right day. In your share this week: tomatoes! an eggplant, bunching onions, squash and cuke, a melon from Freedom Food Farm in Raynham, lots of PYO cherry tomatoes and a big bunch of PYO flowers. Enjoy!

Recipe of the Week
This seems like a great week to make fresh salsa--a favorite in my family. We don't really have a set recipe, just some guidelines to start with and then LOTS of tasting and adjusting. It's a messy, loud, yummy process. Here's some guidelines to start with.

3 cups chopped tomatoes
1 cup onion, diced
1/3 c. minced fresh cilantro
4 Tbsp lime juice
2-5 tsp very finely minced jalapeno or other hot pepper (adjust your amount to how hot your pepper is and how hot you like your salsa)
1 tsp minced garlic
1 tsp salt
several twists of freshly ground black pepper

Chop, combine, taste, adjust, taste, adjust, taste, adjust, enjoy!

Monday, August 18, 2014

Midnight snackers on the farm

First, the important news: the farm family has a new addition this week. Park and Conservation Tech (and Yellow House cohabitant) Steve Vieira adopted this guy over the weekend. Woody is a black lab/German shepherd mix who is delighted with all the attention he's been getting from the farm crew. He'll be hanging around during CSA pickup this week enjoying the social scene if you'd like to meet him.

Last week's deluge provided some much needed water for our crops in the field. And if you can believe it, just two days later, we already had to start irrigating again. On Wednesday we used the rainy weather as a window to get caught up on all our fall crop seeding in the greenhouse. Casey, Sophie, and Joe seeded an epic number of trays of lettuce, spinach, and salad mix while the falling rain made a racket on the plastic roof of the greenhouse. We also transplanted out into the field lots of broccoli, kale, and beet seedlings and then seeded rows of fall radishes, mustard greens and the last green beans of the summer. 

One of our major challenges this season, like last season, has been crop loss due to pests. One of our big investments this spring was the 8 ft high fencing around our largest field. The fence was designed to limit access to our tasty veggies from the local (abundant!) deer population. Last year the deer ate through several thousand dollars of produce and showed a special fondness for our fall lettuce crop. While the new fence has been doing a great job keeping the deer out of our Main Field, our three other fields remain unprotected. We have seen losses of spring greens, cabbages, squash, and lettuce, among other things. Even more surprising and disappointing, the deer decimated our first succession planting of tomatoes and our entire pepper crop this season. This is particularly odd because deer are not known to go after peppers or tomatoes. Last year we had large plantings of both those crops in the same field and both remained almost untouched. 

In addition to the deer, we've also been combating groundhog damage again this year. While our trapping has been very successful this year (19 and counting!), the groundhogs have still managed to do damage to a variety of crops (spring lettuce, fennel, green beans, cabbage, as well as almost a third of our fall brussels sprouts). To top it off, these furry varmints like to taunt us by hanging out at the field edges and watching us make their dinner. If anyone could put me in touch with the head groundskeeper at Bushwood Country Club, please let me know!!

As a result of these particularly challenging pests, we're supplementing some of your shares with produce grown by local farms. We'll be bringing in green peppers and slicing tomatoes this week from Langwater Farm in North Easton, which is certified organic, not to mention award-winning. While this takes a bite out of the CSA budget, we don't want to completely deprive you of these tasty summer classics. This may mean we won't have the funds to buy in seed garlic next month, thereby having to reserve more of our own crop this year for seed stock--we'll see how the numbers shake out this month.

In your share this week: squash and cucumbers, fresh onions and bunching onions, squash blossoms (!! see the awesome recipe below), tomatoes and green peppers, Pick Your Own cherry tomatoes and flowers.  

Enjoy your veggies and flowers this week!

Recipe of the Week
The first time I ate squash blossoms I thought they were just the fancy foodie way of eating fried cheese without having to admit you were eating fried cheese. I later found out that they've been traditionally used in Mexican and Central American cuisine in many ways, not just stuffed with cheese and fried. I've never made the tomato sauce that's included in this recipe originally, but you can follow the link if you'd like to have dipping sauce for your blossoms. A note about keeping your blossoms--they have a notoriously short shelf life, so it's best to use them within a day or two. When you get them home, wrap them in a slightly damp paper towel and put them in a sealed tupperware and keep them in the coldest part of your fridge (but don't let them freeze). 

Squash Blossoms Stuffed with Ricotta
from epicurious.com

1 cup whole-milk ricotta (preferably fresh)
1 large egg yolk
1/4 cup finely chopped mint
2/3 cup grated Parmigiano-Reggiano, divided
12 to 16 large zucchini squash blossoms
1/2 cup plus 1 tablespoon all-purpose flour
3/4 cup chilled seltzer or club soda
About 3 cups vegetable oil for frying

Equipment: a deep-fat thermometer

Stir together ricotta, yolk, mint, 1/3 cup parmesan, and 1/8 teaspoon each of salt and pepper.Carefully open each blossom and fill with about 2 rounded teaspoon ricotta filling, gently twisting end of blossom to enclose filling. (You may have filling left over.) Whisk together flour, remaining 1/3 cup parmesan, 1/4 teaspoon salt, and seltzer in a small bowl. Heat 1/2 inch oil to 375°F in a 10-inch heavy skillet. Meanwhile, dip half of blossoms in batter to thinly coat. Fry coated blossoms, turning once, until golden, 1 to 2 minutes total. Transfer with tongs to paper towels to drain. Coat and fry remaining blossoms. (Return oil to 375°F between batches.) Season with salt.

Monday, August 11, 2014

Rainbow explosion of cherry tomatoes!


Cherry tomatoes are finally here!! The ultimate summer veggie--sweet, juicy, colorful, and snackable just as they are--everyone waits for cherry tomato season. Here at the farm they've been ripening slowly over the last few weeks. We've been pacing up and down the rows watching as the first ones started turn red, or orange, or yellow and or a stripey mix of two colors. When picked and tumbled together they look like Nature's impression of a confetti shower and taste as sweet as a fat slice of birthday cake. Now they're finally here and they taste like summer.


In other farm news, the current total of new Oreo cookie calves is 8! All the babies and mamas are doing well and enjoying life on the hillside pasture. Now that the calves have recovered from birth, they've very playful and are lots of fun to watch explore the world. Two more calves are expected in the next few weeks.

In your share this week: the last of the summer new potatoes from Moraine Farm, bunching onions, eggplant, squash
and cucumbers, and more PYO sunflowers!

Enjoy your veggies this week!


Recipe of the Week
If eggplant parm and eggplant rollatini weren't so damn good, baba ghanouj would be my favorite eggplant recipe. It only comes in 3rd because it's up against such epicly delicious competition.

Baba Ghanouj (also spelled Baba gannoush)
from simplyrecipes.com, one of my favorite food & cooking blogs

1-2 eggplants (~2 lbs)
3 Tbs extra virgin olive oil
2-3 Tbs roasted tahini
1-2 cloves garlic (adjust according to your taste for garlic), finely chopped
1 tsp ground cumin
Juice of one lemon, about 2.5 Tbs
Salt and cayenne pepper to taste
1 Tbs chopped parsley (can substitute basil or cilantro)

1a Oven method
Preheat oven to 400F. Poke the eggplants in several places with the tines of a fork. Cut the eggplants in half lengthwise and brush the cut sides lightly with olive oil (about 1 Tbs). Place on a baking sheet, cut side down, and roast until very tender, about 35-40 minutes. Remove from oven and allow to cook for 15 minutes. Skip to step 2.

1b Grilling method
Preheat grill. Poke the eggplants in several places with the tines of a fork. Cut the eggplants in half lengthwise and brush the cut sides lightly with olive oil (about 1 Tbs). Grill over high heat, turning as each side blackens. Put the charred eggplants in a paper bag, close the bag and let the eggplants steam in their skins for 15-20 minutes.

Step 2
Scoop the eggplant flesh into a large bowl and mash well with a fork. Combine the eggplant, minced garlic, remaining olive oil (about 2 Tbs), tahini, cumin, 2 Tbs of the lemon juice, the salt, and a pinch of cayenne. Mash well. You want the mixture to be somewhat smooth but still retain some of the eggplant's texture.

Step 3
Allow the baba ghanouj to cool to room temperature, then season to taste with additional lemon juice, salt, and cayenne. If you want, swirl a little olive oil on the top. Sprinkle with fresh chopped parsley. Serve with pita bread, crackers, toast, sliced baguette, celery, or cucumber slices.

Friday, August 8, 2014

Farm yoga on Monday!

Quick reminder--we're having farm yoga again on Monday, 8/11, at 5:30pm. Meet at the Yellow House with your mat, bug spray/sunscreen, and maybe an old bed sheet to protect your mat from grass.

See you there!

Monday, August 4, 2014

Peek-a-boo eggplant and funny looking onions

Two new crops are ready this week, both eagerly awaited by us on the farm crew. The fat, glossy eggplants we're picking for you on Tuesday and Thursday have been sizing up sloooowly over the last several weeks, seeming to take forever. The broad, fuzzy leaves of the plant hide the developing fruit from the strong summer sun, and from us, but we've been peaking in on them every few days to check progress. We're happy to report that it's time!

Across the field from the robust rows of eggplant, our bunching onions are also ready to be enjoyed. These red, oblong onions are an early variety that's best eaten fresh--they need to be refrigerated and eaten within
2 weeks. Storage onions that have been cured and are happy to be left on the counter for months will come later in the season. Bunching onions are just as versatile as regular onions and can be used in any recipe that calls for onions. However, grilling them with olive oil and salt until slightly charred remains my all-time favorite way to eat them. Halve or quarter them lengthwise, leaving the tops on, and the roots on too--that'll help hold the layers together while you're flipping them with the grill tongs. Brush with olive oil, sprinkle with salt and pepper, and grill until very soft and slightly charred--YUM!

Despite being in full summer mode, we're still thinking ahead to fall and to fall crops. Last week our main crops of fall carrots and fall beets germinated, pushing through damp, heavily-irrigated soil to send their tap roots down deep, searching for the trace minerals they need for healthy growth. Fall broccoli and kale crops have been growing in their cells on tables outside the greenhouse and are ready to go out into the field and soak up the summer sunshine now, ahead of the shorter days of September and October. Over the coming weeks we'll seed more and more fall root crops and plant out our other greens and brassica crops, piecing together the fall shares a little bit at a time.

In your share this week: more new potatoes, squash and cuke, eggplant, red bunching onions, and more PYO sunflowers. Enjoy your veggies this week--I hope they contribute to some memorable dishes!

Monday, July 28, 2014

You say potato, I say....yummy!

freshly harvested new potatoes
photo: Liz Green
We're excited to have new potatoes from Moraine Farm this week! As I mentioned last week, the potato crop is a little late this year (effects of the cold spring are catching up to us here), but it's finally ready to be dug and enjoyed. Moraine Farm in Beverly, MA is one of our sister Trustees farms and farmers Gretta and Liz do a stellar job with potatoes there every year. Our soils here at Weir River aren't well suited for potatoes and after last year's disappointing crop, I decided to focus on the many other crops that actually like our low acidity, compost-rich soils. 

The other big news of the past week is that our Oreo cookie cows have started calving. The first baby was a bit of an early surprise on Tuesday morning, then two more followed on Thursday, and two more today. Despite a few difficult deliveries, so far all mamas and babies are doing well. We can give you more updates on your pickup day, as well as point you toward the best baby calf viewing spots of the day. You might even get to witness one of the last few births we're expecting this week!

In your share this week: more squash and cucumbers--the bumper crop continues as we transition into the mid-season succession!, new potatoes from Moraine, a big bag of basil, PYO parsley (see recipe below if you're running out of parsley ideas), and PYO mini sunflowers!
Enjoy your veggies and your mini sunflowers this week!

Recipe of the Week 
Last year's farm apprentice, Leah, introduced me to this recipe and it's a favorite now. Try it on your new potatoes this week!

Marcella Hazan's Bagnet Vert (a delicious green parsley sauce)
from Marcella's Italian Kitchen

1/2 c. bread crumbs (fresh
1/2 c. red wine vinegar
1/2 c. tightly packed parsley
1/2 tsp minced garlic
2 or 3 anchovies
1 hard boiled egg yolk
3/4 c. extra virgin olive oil 
Freshly ground black pepper and salt to taste

Soak bread crumbs in vinegar until thoroughly soaked, then squeeze them out with your hands. Put all the ingredients except for the EVOO into a food processor and pulse to combine. Add the EVOO and blend thoroughly. Serve at room temperature or store in the refrigerator for up to 3 days. Excellent spooned over fish, shrimp, potatoes, or tomatoes.

Monday, July 21, 2014

Mid-summer classics

Two mid-summer crops are ready for harvest this week, some fragrant basil and some juicy baby fennel bulbs. Our resident groundhog population enjoyed eating quite a bit of the fennel crop when it was first planted in May, but we were able to save enough for you to enjoy some as well. The basil crop is looking healthy and vigorous and should keep producing long enough to overlap with our soon-to-be-ready tomato crop.

Moraine Farm in Beverly.
Photo: Elizabeth Green
Since the first growing season at Weir River, we've struggled growing potatoes--our soil type and soil pH are ill-suited to the particular demands of potato plants. The plan this year was to work with sister Trustees farm, Moraine Farm, and Farmer Gretta to have our potatoes grown there, where they have
ample room and the lower soil pH that potatoes crave. About a month and a half ago I learned from Gretta that her potato crop is late this year, like virtually all New England farms after the cold spring we had. Small and tender new potatoes were originally expected in early July to fill out the shares between our spring crops and the late summer onslaught of tomatoes and cherry tomatoes. A behind-schedule potato crop left me worried that we would have a bit of a gap, with skinny shares throughout July. Gretta tells me that she's expecting new potatoes to be ready to harvest for next week's share, which is excellent news. And fortunately, our bumper crop of squash and cucumbers is filling out our shares quite nicely.

In your share this week: more squash and cucumber, baby fennel, basil, choice of beets or carrots and PYO green beans. Enjoy your veggies this week!

Recipe of the Week
Inspired by CSA Member Sue Roy, who delighted me on Saturday with some homemade bread and butter pickles she made with last week's share, I wanted to share this recipe. I got this originally from Annie Rockwell, the first farmer I apprenticed for fresh out of college. She taught me innumerable things about vegetables that summer, including the idea that pickles could be sweet and could be made with zucchini, which blew my mind just as much as everything else I was learning on her farm.

Annie's Bread and Butter Pickles
makes 5-6 pints

5 medium zucchini, sliced
1/4 c. sea or kosher salt

syrup:
2 c. sugar
2 1/2 c. cider vinegar
3/4 tsp tumeric
1/4 tsp clove
pinch of ginger
1/2 tsp celery seeds
a few whole peppercorns
1 Tbs mustard seeds

In a large bowl, place sliced zucchini and salt and cover with water. Refrigerate overnight. Drain well in the morning.
Combine the syrup ingredients and bring to a boil in a large stock pot. Stir in zucchini and return to a boil. Remove from heat and place in jars. Pour in remaining syrup to cover. Cover and keep refrigerated. Pickles will be ready in a day.
Note: this recipe is for refrigerator pickles, not shelf-stable pickles.

Monday, July 14, 2014

Zukes & cukes steal the show this week

First Sungold cherry tomato
getting a blush of orange
color
This past week saw the farm crew in the trenches harvesting squash and cucumbers, two crops that produce veggies almost as fast as we can pick them. Looking at the plants today, I see a lot of new fruit that will be ready this week, so we'll have another bumper week for those two summer staples. 

While we continue to play the waiting game with our thousands of tomato plants (sharp eyes spotted the first cherry tomato starting to color up on Friday!), we have another new crop coming in this week--carrots! These guys are still pretty young (and very tender), but they're very tasty. I seeded these carrots all the way back in early April, when the soil was still very cold from the long winter. I worried over them for weeks, as they took forever to germinate--cold soil can significantly slow that process down. They finally popped up and the whole farm crew took several afternoons to weed them by hand very carefully. Now they're finally big enough to start harvesting and we're all excited to start enjoying them!

In your share this week: lots of cucumbers and squash (green zucchini, golden zucchini, and yellow summer squash), young and tender carrots, mini cabbage or chard, beets, hakurei, and parsley. 

Recipe of the Week 

Zucchini and Fresh Herb Fritters
from Deborah Madison's Vegetarian Cooking for Everyone

Salt and freshly ground pepper
2 lb green or golden zucchini, coarsely grated
2 eggs, beaten
1 bunch scallions, including an inch of the greens, thinly sliced
1 c. dried bread crumbs 
2 garlic cloves, finely chopped
1/2 c. chopped parsley
1 Tbs chopped marjoram or basil 
1 tsp chopped mint
Olive oil as needed

Lightly salt the zucchini and set it aside in a colander to drain for 30 minutes. Meanwhile, mix the remaining ingredients together except for the oil and the pepper. Quickly rinse the squash, squeeze out the excess water, then stir it into the batter. Taste for salt and season with pepper. 
Film two large skillets with olive oil. When hot, drop in the batter--1/4 cup makes a fritter about 3.5 inches across--and cook over medium heat until golden brown on the bottom. Turn and cook the second side. Serve hot.  

Monday, July 7, 2014

Crisp & cool & perfect for summer...

Cucumbers are back! Our first field planting is finally ready for picking and we're looking forward to many weeks of crisp, cool, juicy, fresh-off-the-vine cucumbers. Luckily this classic summer veggie is super versatile--cucumber salads, quick pickles, in agua fresca, or juiced with other farm veggies--the list goes on and on. Best of all, our cukes are picked fresh for you, so you don't have to peel them like the waxed ones in the grocery store!

Nutritionally, I think cucumbers have been written off as lightweights, but they really have more to offer than what's generally recognized. In the vitamin department, they're a decent source of Vitamin K (needed for bone health), but more importantly they contain phytonutrients like lignans and flavonoids, which are antioxidants, anti-inflammatory, and anti-cancer.

Also in your share this week: zucchini!, beets, mini cabbage, parsley, choice of kale or chard, sugar snap peas!!, and hakureis. In the field you can pick your own green beans (another first of the year for this week!) and dill.

Farm yoga is back again this Saturday at 5:30! Meet us at the Yellow House with your mat and any sunscreen/bug spray/water you'd like to bring. Yoga class is free for members and donation (to benefit our Food Access Fund) for friends, who are very welcome!

Enjoy your veggies this week!

Recipe of the Week
This one comes from the food blog The Yellow House, which I was first introduced to by CSA member (and food blogger herself at the always-gorgeous I Will Feed You blog) Lindsay Grimes. After Wednesday it looks like it will cool down enough to turn on the oven without causing an uprising in your household, and this roasted wedge salad is super simple.

Roasted Cabbage Wedge Salad

1 head cabbage (recipe calls for savoy, but this will work with our tender mini cabbages just fine)
1-2 Tbs olive oil
Kosher salt

5 Tbs olive oil
3 Tbs sherry vinegar
1 tsp dijon mustard
Kosher salt
Fresh ground black pepper

Pecorino romano cheese

Preheat the oven to 450. Using a large, sharp knife quarter (or halve) the cabbage. Trim away any very pithy or brown ends of the core, but leave the core intact. The core will hold the wedges together when roasting.
Arrange the cabbage wedges on a baking sheet. Drizzle the wedges with the olive oil and then sprinkle liberally with kosher salt.
Transfer the baking sheet to the oven. Roast the cabbage for 30 minutes, flipping the wedges at 15 minutes to make sure they brown evenly. At the conclusion of roasting, the cabbages may have some blackened, crispy outer leaves. If you don't want this, take them out a few minutes early, but note that the inside of the cabbage may be less tender than if you had left it in longer.
While the cabbage is roasting, make your vinaigrette: whisk together olive oil, sherry vinegar, and dijon. Taste the vinaigrette and season with salt and pepper to taste.
When the cabbage is finished, work quickly. Plate the wedges, drizzle with vinaigrette, and grate pecorino romano over the top. Serve immediately, while the cabbage is still hot.

Monday, June 30, 2014

Some Must-See Eye Candy

First, some eye candy from around the farm in the last week or so--

Chard harvest
photo: Lindsay Grimes
Last week's share, beautiful arranged
photo: Lindsay Grimes
Having wrapped up the bulk of our spring plantings (although we'll continue planting and seeding various things all the way up to the beginning of September), the farm crew has turned to some other farm projects. This past week we tackled a big weeding project in our popcorn planting, which occupies almost a quarter of Quaker field (across from the brick hospice). The weeds were growing fast and threatening to overtake our crop so we pulled out all the stops--our Cub cultivation tractor, followed by our trusty wheelhoe, then scuffle hoes and hand-weeding to finish the job. The beds look fabulous and are ready for some irrigation, which has been our other project this past week as the days turned hot with no rain in sight. So far we have almost all of our key summer crops supplied with drip irrigation, the most efficient and effective way to bring water to thirsty crops. The drip irrigation lines we run along side the rows of plants emit water right at soil level (so very little water loss to evaporation like an overhead irrigation system) and deliver it right to the root zone of the crop (and not to the weeds that might grow between the rows). With our dry soil and the last significant rainfall a distant memory, our crops would have suffered during the hot days of the last week, but instead they were happy, irrigated crops, loving the summer heat above ground, and slurping up good, clean  well water below ground.

In your share this week: parsley, beets, 2 bunches of hakurei, salad mix, a mini cabbage, garlic scapes, choice of chard or kale, and PYO dill or oregano. Please remember to return the PYO scissors to the basket when you're done with them--we've found a couple in the pathway!

Recipes of the Week

Wondering what to do with TWO bunches of hakureis? Lynn Rosseto-Kasper of The Splendid Table (a great radio show/podcast and food blog) has this recipe for Fast Japanese Pickles. As written here, it calls for carrots, radishes, and turnips (or some other variations), but I like it with just the hakurei--2 bunches does the trick. It takes me about 20 minutes to make, sits in the fridge for an hour, then it's a great snack or side.
If the kale and chard have left you looking for new recipe ideas, I have a few to share. Real Simple has a collection of 24 easy kale recipes (try the Curried Kale with Coconut!) that are excellent and sure to have something for every taste. Lately I've been enamored with a very simple sauteed chard recipe from Deborah Madison's excellent Vegetable Literacy. I've tried it finished with several kinds of vinegar (sherry, apple cider, white wine) and they were all good, but I like it best with an infused (honey and ginger) white balsamic that I got as a gift.

Sauteed Rainbow Chard with the Stems
serves 2-4
5-10 minutes prep, 10 minutes active time

1 bunch chard
2 Tbs olive oil
Sea salt to taste
1 Tbs butter or ghee
Freshly ground pepper
Lemon wedges or robust vinegar, for serving

Separate the leaves from the stems. Select some of the better looking stems, cut them into similar-sized pieces about 1 inch long, and set aside. If the remaining stems are very thick, cut them in half lengthwise, then cut them into 1 inch long slices; you should have about 1 1/2 cups. Chop or tear the leaves coarsely, you should have about 8 cups. Rinse and set aside in a colander to drain.

Heat the oil in a wide, deep skillet over medium-high heat. Add the sliced stems and cook for about 3 minutes. Season with a few pinches of salt, then add the chopped leaves, cover, and cook until wilted and tender, at least 6 minutes. Taste the chard to be sure it is as cooked as you want. Restaurants tend to undercook chard, and while it looks beautiful and bouncy on the plate, it is not nearly as good to eat as when it is actually tender. Remove the lid and stir in the butter or ghee. Taste for salt, season well with pepper, and pile onto a plate. Serve with something sharp, lemon wedges or vinegar, to bring up the flavors.

Enjoy your veggies!

Monday, June 23, 2014

New greens this week

Every week the array of produce that we're harvesting out of the field shifts a little bit. Some crops carry over from the week before, new crops make their first appearance, and others drop off as their harvest finishes for the season or there's a gap between different
The baby cuke is the spiny little thing between the
yellow flower and the stem.
successions of the same crop. Cucumbers are in a 
succession gap right now, as the first succession we've been babying in the greenhouse for over 3 months finishes its run before our first succession of field-grown cucumbers is ready. The good news is that the field cukes are not far off! Right now the plants have 2 or 3 baby cucumbers on them, each about the size of my fingernail. Some sunshine and some warm weather is all they need to grow big enough to harvest. 

All the way back in March, on a blustery, chilly day, we seeded some escarole in our bright, warm greenhouse. Escarole is in the lettuce family and looks very similar to the green leaf lettuce we've
been harvesting lately. Slightly bitter by nature, I've heard escarole described in a beer analogy--lettuce is to escarole what Bud Light is to Guinness. Chefs often pair escarole with sweeter salad dressings and sometimes fruit toppings to play up the flavor differences, but you can also make different variations of beans and greens, or just chop it and add it to your salad mix. Store it in the fridge like lettuce (I wrap mine in a wet paper towel or thin kitchen towel and put it in a plastic produce bag) and use within a week to 10 days. 

In your share this week: lettuce, spinach, hakureis, chard or kale, beets!, mustard greens, garlic scapes, salad mix, escarole, and Pick Your Own dill, cilantro, or oregano (choose 2). 

Enjoy your veggies this week!

Recipe of the Week 
Escarole Salad with Apples and Pecans
from Martha Stewart's great online collection of escarole recipes

1 Tbs olive oil 
1 Tbs white wine vinegar
2 tsp Dijon mustard
coarse salt and ground pepper to taste
1 head escarole, cored, trimmed, and torn into bite sized pieces
1 apple, halved, cored, and thinly sliced
1/2 cup pecans, toasted

In a large bowl, whisk together olive oil, vinegar, Dijon and 1 Tbs water; season with salt and pepper. Add escarole, apple, and pecans. Toss and serve immediately. 


Thursday, June 19, 2014

Spinach!!


It's been a great spring for spinach--that's another crop that loves the cooler weather we had in April and May. After coming in strong for the last few weeks, we were worried about it surviving the recent heat wave. But Sophie reported that this morning's harvest is looking as good as ever!